JGaulard
Administrator
Pro Member
- Joined
- Apr 12, 2019
- Messages
- 33
- Reaction Score
- 3
- Points
- 33
My friend recently took his 2008 Mazda 3 in for his yearly safety inspection in Maine and the car failed because his driver's side (left) control arm ball joint was worn out. The ball was visibly moving in the socket. He got an estimate for a replacement from a local automotive repair service and that came up to around $380 for parts and labor. Since we are some serious backyard mechanics over here, we decided to change the entire lower control arm ourselves. After pricing out the part, we ordered it for $40 plus $10 shipping from RockAuto. If you aren't aware, there are some awesome deals on RockAuto.com. Insane deals.
We changed the control arm today without issue. I thought I'd write a brief synopsis and offer some photos I took during the process.
Let me first tell you that, after jacking the car up and removing the tires, there are only four bolts that need to be removed. Also, you don't need to take apart the tie-rod end to get to the control arm ball joint bolt. You'll need some 1/2 sockets and some pry bars. You'll also need a small jack to help you get the new control arm in place, once it's set.
Okay, so we first removed the nut that holds on the ball joint bolt. Once the nut was off, we tapped the bolt to push it through the hole. If you take a look at this photo of the old control arm, you'll see a ridge around the ball joint peg (or rod or arm - whatever you call it). When this peg is pushed through the part that clamps it to the spindle, the bolt goes through and this groove makes everything stay together.
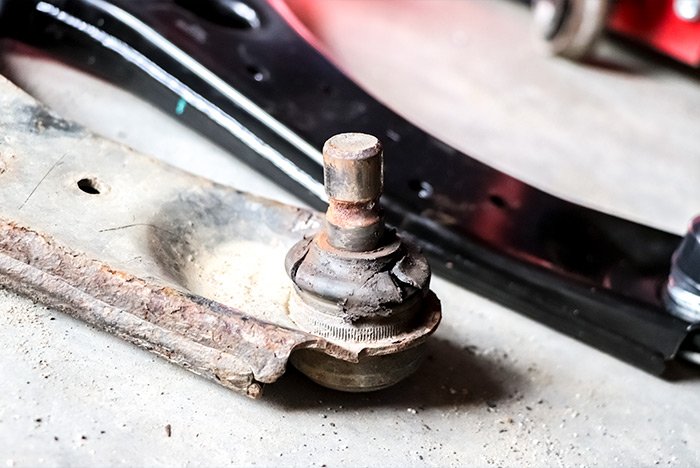
This part of the ball joint pushes through this part of the spindle.
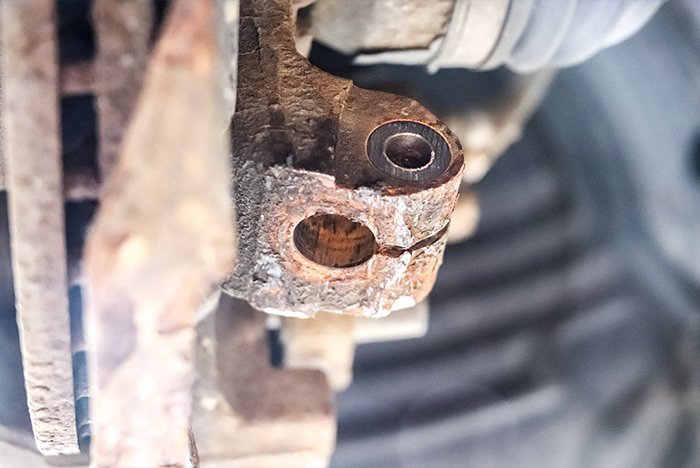
I took the above photo from underneath.
Now, it's pretty tough getting the ball joint out of this hole. It really doesn't want to go. I am telling you right now, you need a ball joint separator fork set. We first used one fork and banged on it pretty hard. As the ball joint began sliding out of the hole, we had to add on (stack) two additional forks in order to get it to slide out all the way. This tool is probably the most important out of everything.
After this, we removed the one long bolt that held on the control arm bushing mount and then the two other long, but shorter bolts that held on the other control arm bushing mount.
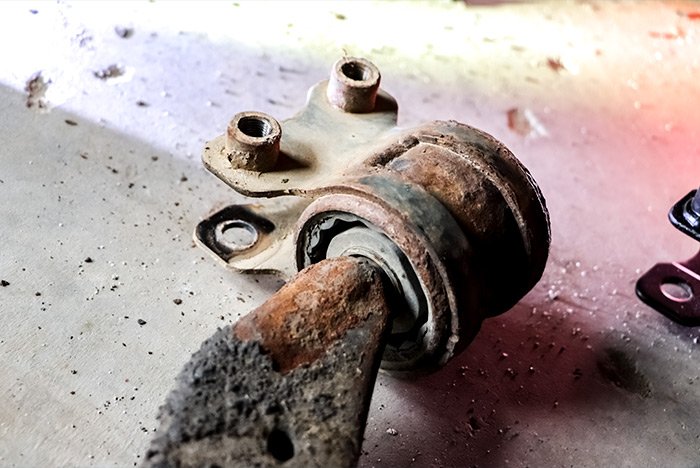
This is the first mount and where it mounts to.
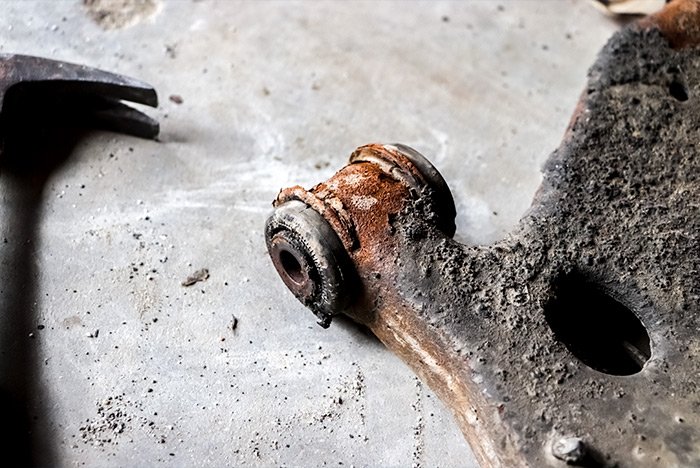
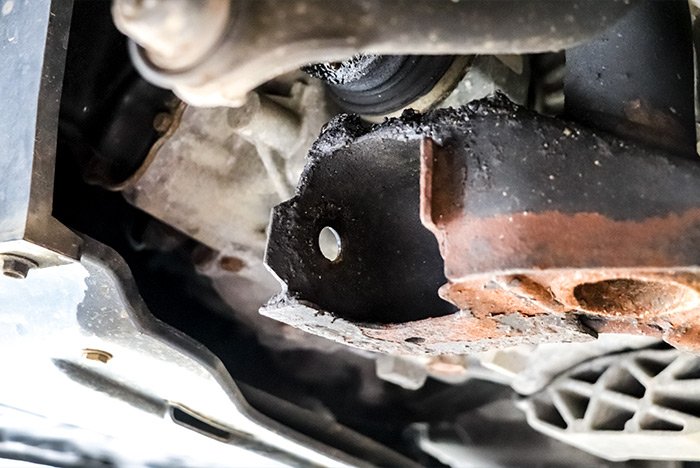
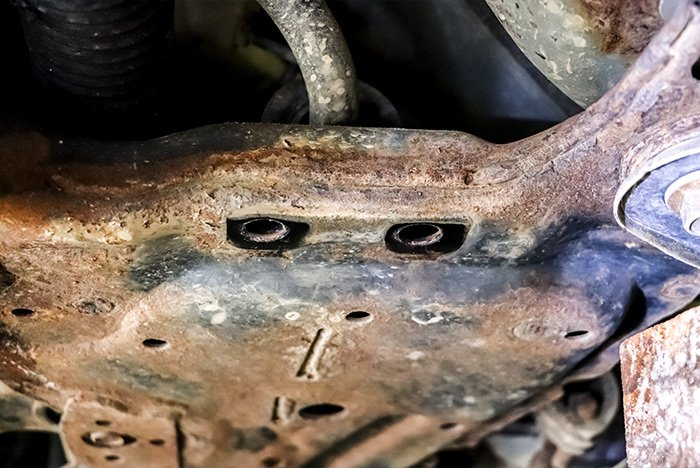
And this is the second mount and where it mounts to the frame.
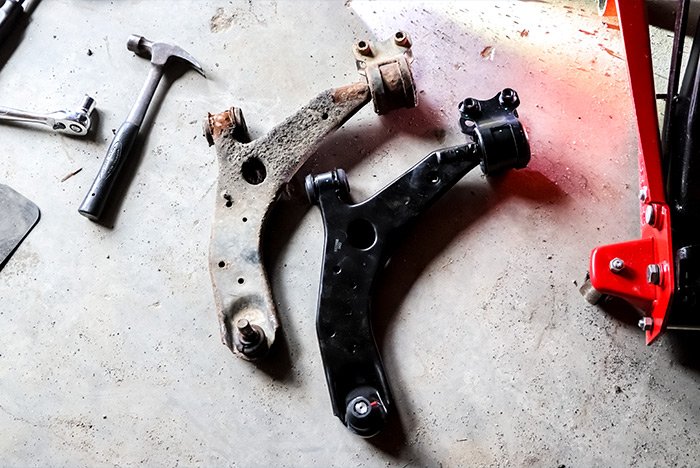
Here are both the old and new control arms. There was no rubber bumper attached to the old one, so there was nothing to mount on the new one.
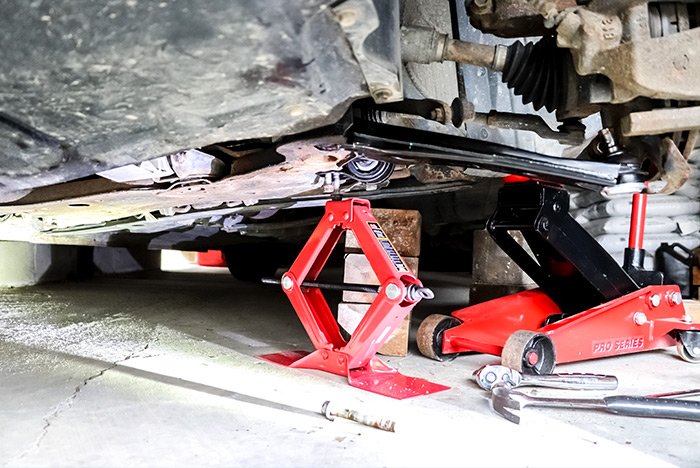
As far as putting everything back together, it's sort of tricky. We found that the mount with the two holes in it should go on first. Be sure to hold the spindle out of the way, but not too far as to pull the CV joint out of its socket. Push the control arm mount onto the frame. It's tough to line the bolt holes up, so what we did was to get one bolt in and then hold that bolt up with a bit of pressure from a scissor jack. With the pressure on, we wiggled the control arm around until the bolt connected with the top threads. Once that happened, we kept the scissor jack in place and turned the bolt with a wrench. We figured this out after about a half hour of wrestling with the thing.
Here's a photo of the jack holding up the bolt.
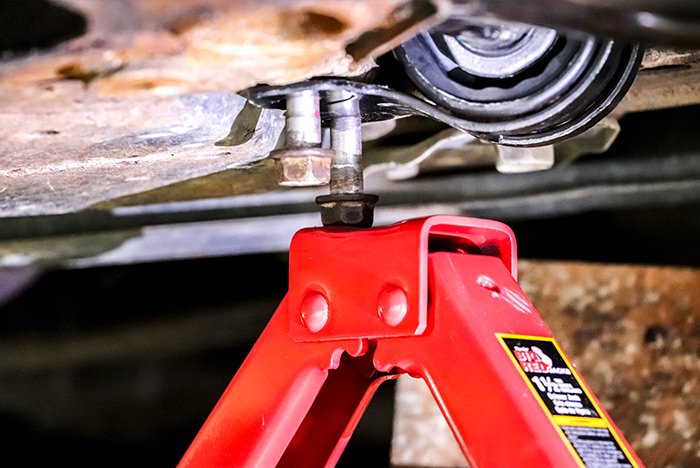
Once that was completed, we put the other frame mount bolt in. We had to use pry bars to finagle that into position as well. That's the hardest part; trying to get those mounts into position so the bolts can slide through easily and catch the threads on the other side.
After those bolts were in, we placed the scissor jack under the ball joint and raised it up. That pressed the joint arm into the hole and finally, we slid that bolt back through and tightened everything up.
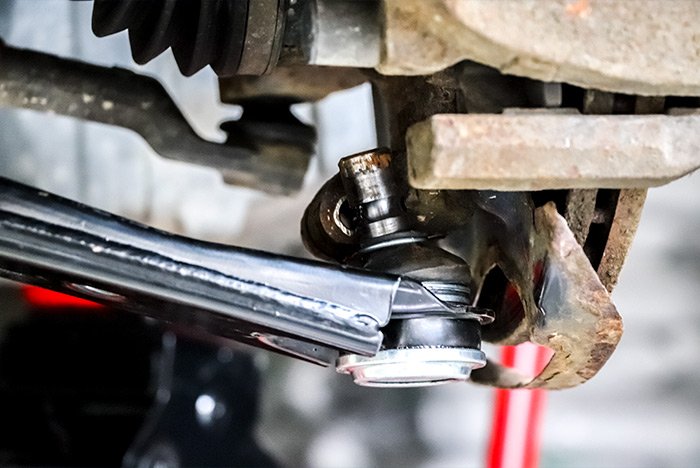
All in all, it wasn't a bad job. The two most challenging areas were getting the ball joint out of its hole and then getting that double bolt mount into position correctly. Other than that, this is a very doable auto repair job. I would definitely recommend taking it on with two people though. Unless you have four hands and arms.
Let me know if you have any questions or thoughts.
We changed the control arm today without issue. I thought I'd write a brief synopsis and offer some photos I took during the process.
Let me first tell you that, after jacking the car up and removing the tires, there are only four bolts that need to be removed. Also, you don't need to take apart the tie-rod end to get to the control arm ball joint bolt. You'll need some 1/2 sockets and some pry bars. You'll also need a small jack to help you get the new control arm in place, once it's set.
Okay, so we first removed the nut that holds on the ball joint bolt. Once the nut was off, we tapped the bolt to push it through the hole. If you take a look at this photo of the old control arm, you'll see a ridge around the ball joint peg (or rod or arm - whatever you call it). When this peg is pushed through the part that clamps it to the spindle, the bolt goes through and this groove makes everything stay together.

This part of the ball joint pushes through this part of the spindle.

I took the above photo from underneath.
Now, it's pretty tough getting the ball joint out of this hole. It really doesn't want to go. I am telling you right now, you need a ball joint separator fork set. We first used one fork and banged on it pretty hard. As the ball joint began sliding out of the hole, we had to add on (stack) two additional forks in order to get it to slide out all the way. This tool is probably the most important out of everything.
After this, we removed the one long bolt that held on the control arm bushing mount and then the two other long, but shorter bolts that held on the other control arm bushing mount.
This is the first mount and where it mounts to.


And this is the second mount and where it mounts to the frame.


Here are both the old and new control arms. There was no rubber bumper attached to the old one, so there was nothing to mount on the new one.

As far as putting everything back together, it's sort of tricky. We found that the mount with the two holes in it should go on first. Be sure to hold the spindle out of the way, but not too far as to pull the CV joint out of its socket. Push the control arm mount onto the frame. It's tough to line the bolt holes up, so what we did was to get one bolt in and then hold that bolt up with a bit of pressure from a scissor jack. With the pressure on, we wiggled the control arm around until the bolt connected with the top threads. Once that happened, we kept the scissor jack in place and turned the bolt with a wrench. We figured this out after about a half hour of wrestling with the thing.
Here's a photo of the jack holding up the bolt.


Once that was completed, we put the other frame mount bolt in. We had to use pry bars to finagle that into position as well. That's the hardest part; trying to get those mounts into position so the bolts can slide through easily and catch the threads on the other side.
After those bolts were in, we placed the scissor jack under the ball joint and raised it up. That pressed the joint arm into the hole and finally, we slid that bolt back through and tightened everything up.

All in all, it wasn't a bad job. The two most challenging areas were getting the ball joint out of its hole and then getting that double bolt mount into position correctly. Other than that, this is a very doable auto repair job. I would definitely recommend taking it on with two people though. Unless you have four hands and arms.
Let me know if you have any questions or thoughts.

